At Gofore we pride ourselves for having the best of the best when it comes to talent. Finding and securing the best people is not easy and we have to find creative and interesting ways to attract them. In an effort to attract a new crop of talented developers to our office in South Wales, UK, we recently invited 15 students from around the area to join us in the Swansea office for a hackathon event. The idea was to identify students with the potential to grow into tomorrows experts.
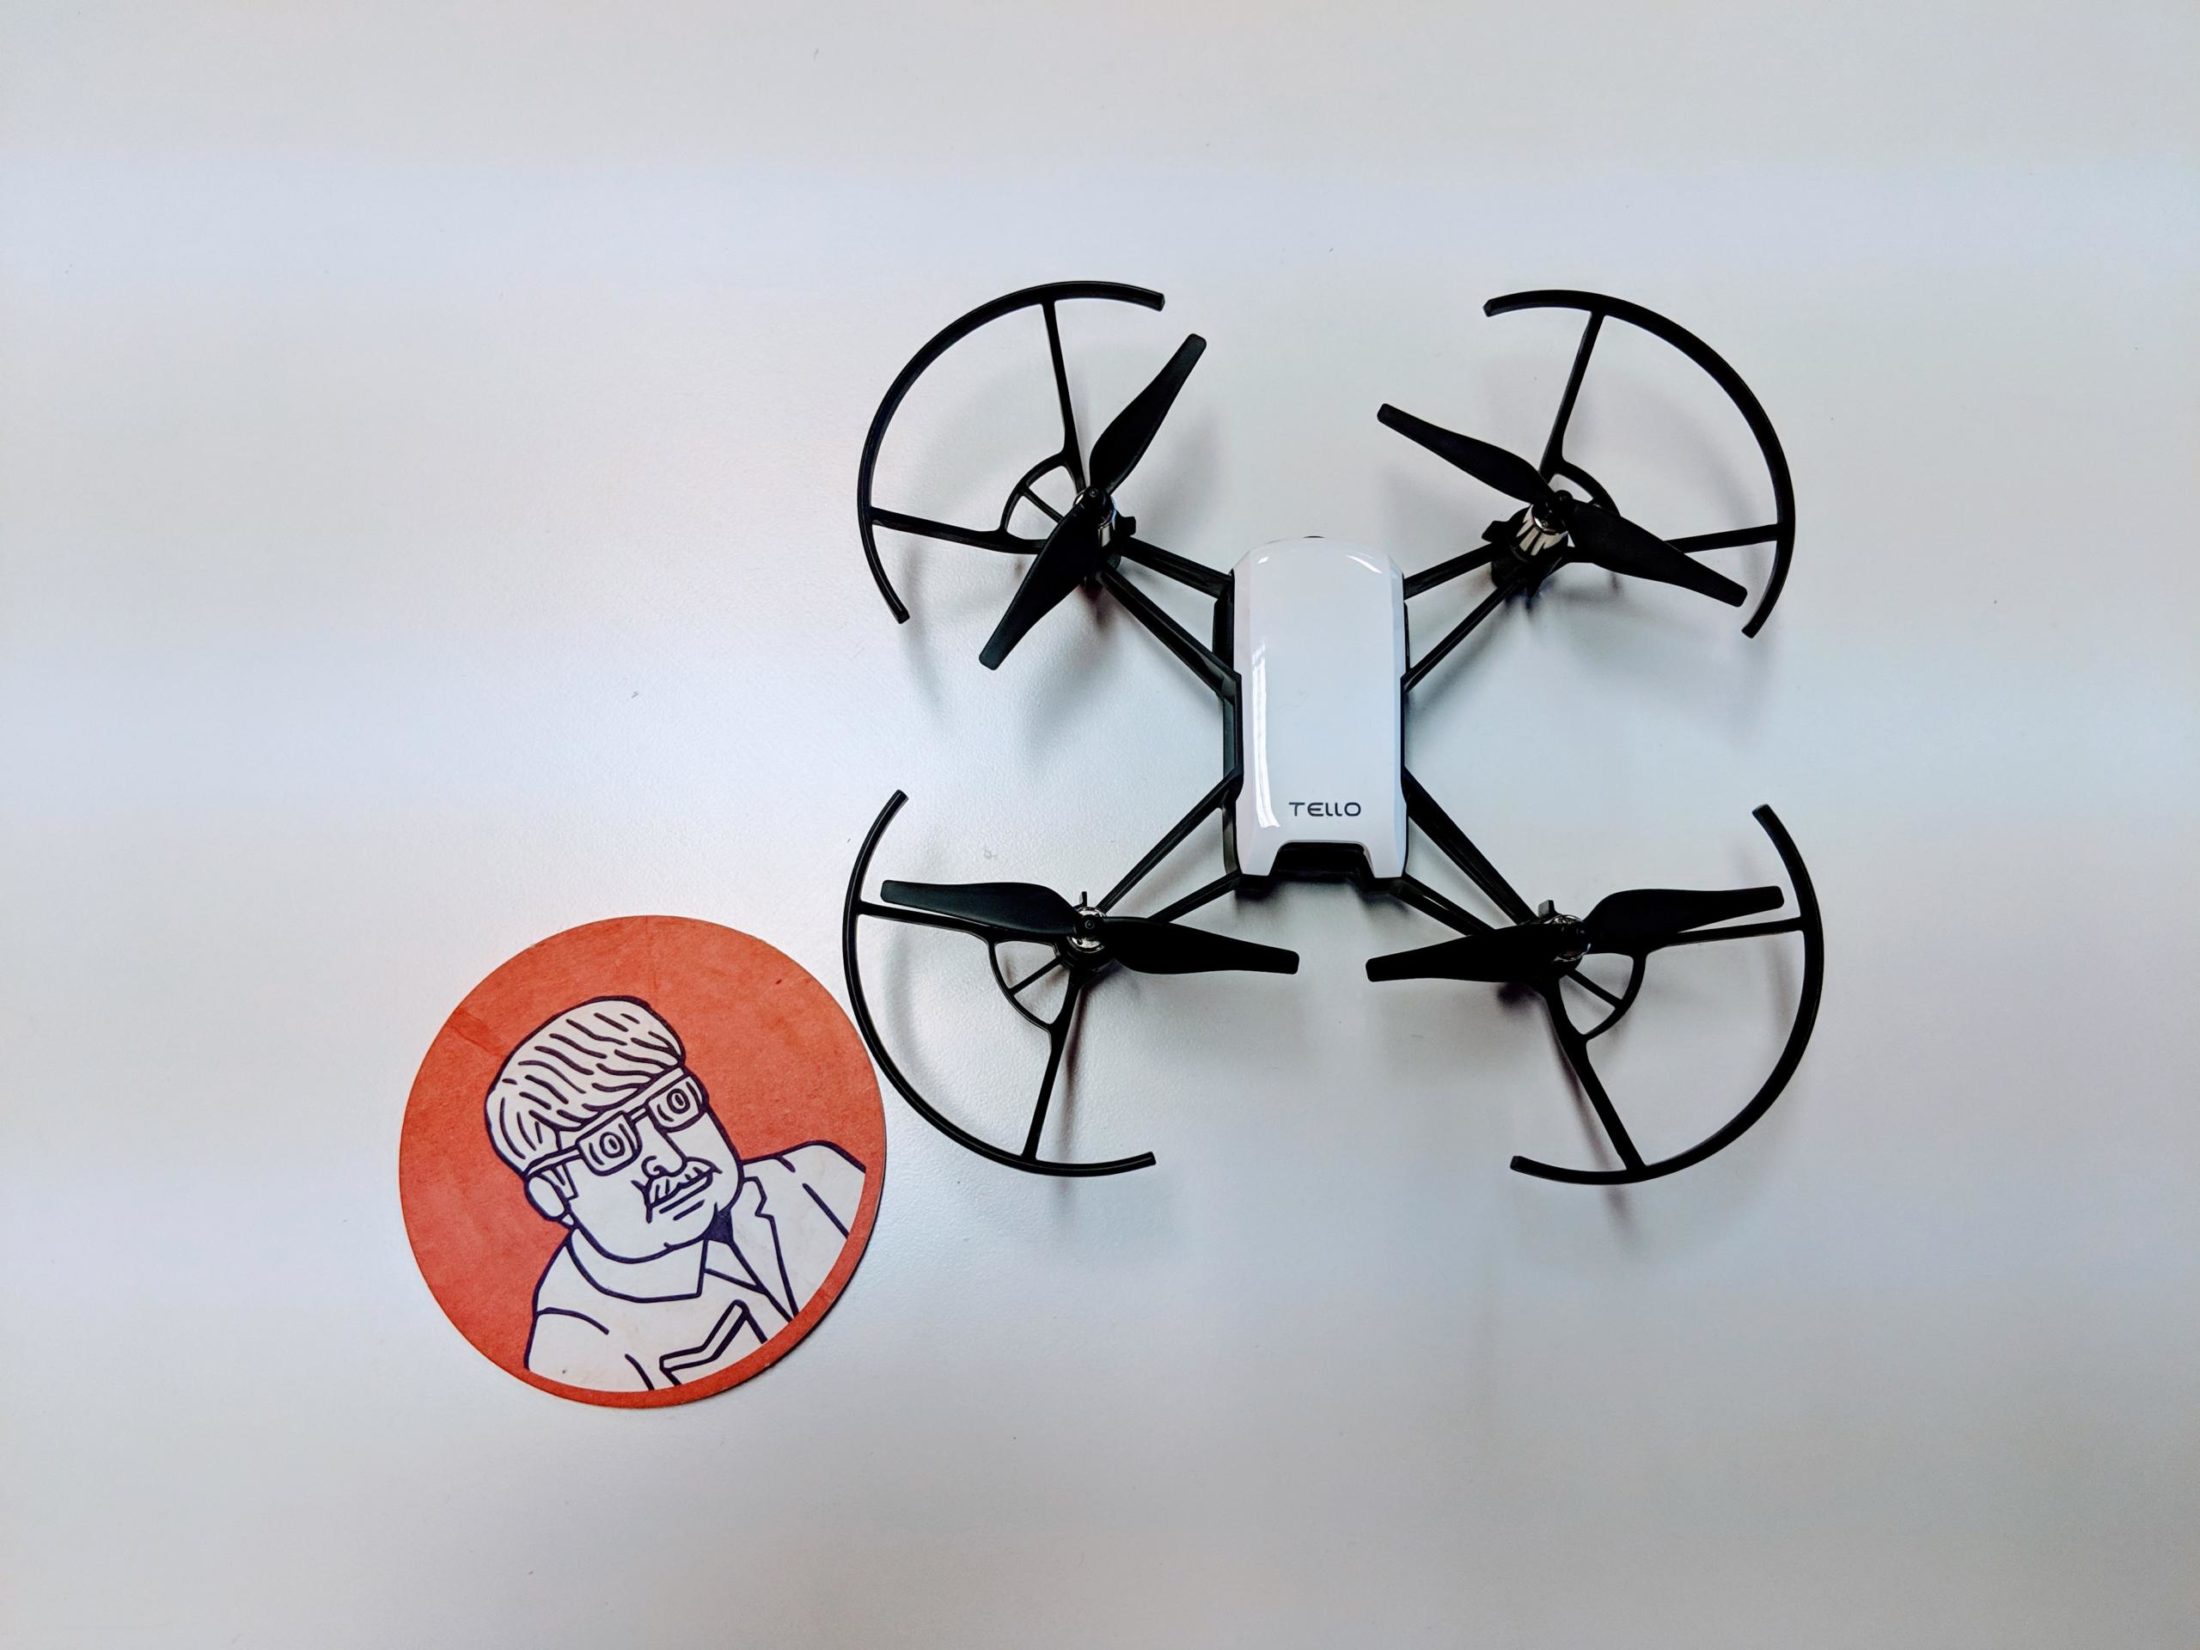
We devised a task to create an application that could control a DJI Ryze Tello drone with nothing but code written during the hackathon. The students could use any language or tools they wanted and the only firm requirement was that there was some element of user interaction involved, in other words, the ability for a non-coder to control the drone. The students then faced a series of races/challenges to test out the code they had written.
So with that in mind, I thought it was only fair to attempt some of the challenges myself. So in this blog, I’ll show you my take on getting a drone to fly with Node.js

Getting started
The first part, as with any project is getting it all set up. I decided to use JavaScript (Node.js) simply because I’m looking to get something up and running as quickly as possible. JavaScript is also the main language that I use at the moment in my day-to-day activities, so its fresh in my mind. Also if I decide to add some form of UI using web technologies such as React, Vue or Angular then this will be (slightly) easier with a full-stack JS application.
In theory, you can use any programming language for this, the one requirement is that the language somehow allows you to open up a datagram socket as the way we will communicate with the drone is via UDP.
We can connect to the drone directly via WiFi as the Tello drone has its own hot-spot built in. Once we are connected we can start to send commands to the drone. The drone has an SDK that we can use which allows us to send plaintext commands to it.
More information is available in the official SDK documentation
I won’t go into too much detail about how I set up my project as there’s nothing that special going on. This is a simple “vanilla” Node.js project with no dependencies other than some of the core modules that come with Node. That being said, here are the steps you will need to follow to get started on your own:
Create a new folder on your system for the project, I’ve chosen to name the project tello-ctrl but feel free to use anything you would like.
- (optional) Initalize a new git repository (git init) and link to a repository on GitHub/BitBucket/GitLab
- Inside the project folder run npm init -y this command will run the usual npm init command and will accept the default values that npm init provides.
- Create a new source folder ‘src’ in the tello-ctrl folder, this is where all of our code will go. In order to do this, I’m going to make use of the ‘readline’ package that’s available as part of node. First we need to import the package (as I’m not using Babel or any other pre-processor here I’ll have to use the older require style syntax to do this) then once we have this imported, we can use the createInterface function which will take two streams as arguments; one stream to read from and one stream to write to. We can pass in the process.stdin and process.stdout streams for read and write respectively.
All of the code in this project is contained in my GitHub account https://github.com/csscottc/drone-ctrl.
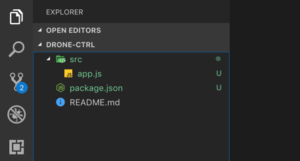
Once all that is done, you should have a directory structure that looks something like this (when viewed in vs code)
Preparing for take off
Code for this section can be found in the basicio branch.
Once the project setup is done its time to actually write some code. The first thing we need our app to do is to accept some basic inputs from the terminal, down the line this will allow us to send commands to the drone when we detect certain strings as input. For example, if the user enters “takeoff” we can, in turn, send a take off command to the drone.
const readline = require("readline");const rl = readline.createInterface({ "input": process.stdin, "output": process.stdout}); |
Once that’s done we can add an event listener to rl for the “line” event that is fired. This event will be fired whenever a line is detected, which in our use case will be whenever the user hits the enter/return key after typing in a command. The event listener will take a function that it will fire whenever the line event is detected, it will pass the line that has been entered as the first argument to our function. For now, we will just pass the line that’s received straight over to console.log, This means that whenever a line is detected from the user, the line will be logged to the console.
console.log(`Lets get started!`);console.log(`Please enter a command:`);rl.on("line", line => console.log(line)); |
Once that’s done we can run our app for the first time. To do this head back to the terminal and then run:
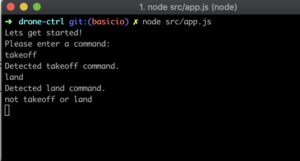
> node src/app.js
You should notice that the lines “Lets get started!” And “Please enter a command:” are printed to the terminal. If you enter some text and then press enter/return you should see whatever text you entered repeated.
Now that we have some rudimentary IO set up we can start to look out for when the user enters specific commands, such as “takeoff”, “land”, “forward”, “back”, “left”, “right”. To do this we will add a new function “handleInput” which will take in the line passed to it by the event listener and will perform a simple switch statement on the content of the line. By doing this, depending on what the line received from the user contains we can then execute specific functionality in our app.
function handleInput(line) { switch (line) { case "takeoff": console.log("Detected takeoff command."); break; case "land": console.log("Detected land command."); break; default: break; }} |
Once we’ve created our handleInput function, we can then pass the line we receive from our event listener to it like below:
rl.on(“line",handleInput); |
If we run the application this time then only when the line is equal to either “takeoff” or “land” should we see something printed to the terminal.
Take Off & Landing
The code for this section is available in the basic-movement branch.
It’s now time to finally connect to our drone and send some of the most important commands to it. Take off and Land.
In order to send commands to the drone, as mentioned previously we will use the UDP protocol. In order to create a UDP socket in Node.js we need to make use of the “dgram” module, similarly to how we made use of the “readline” module earlier for our basic IO. The createSocket function that’s available as part of the “dgram” module can be used to create a socket which can be bound to a port of our choosing. Once we have a socket bound to a port, it can be configured to listen to incoming messages as well as to send outgoing messages for us.
When you connect to the Tello drone over Wi-Fi, it will be listening for command type messages on port 8889. It will assign its self the IP address 192.168.10.1 on the network it hosts – we will need this information when creating our socket.
To keep things tidy we will create a function called “getSocket”, the function will create a socket using the “createSocket” function that’s imported from the “dgram” package and will then bind this socket to the Tello command port, which is 8889. It will then return to us this socket that is ready to be used for communication with the drone.
function getSocket() { const socket = createSocket("udp4"); socket.bind(TELLO_CMD_PORT); return socket;} |
Another thing we will do at this point is to wrap up some of our existing code in an Immediately Invoked Function Expression (IIFE). This will allow us to declare the function as async which will allow us to make use of Async/Await, enhancing the readability and maintainability of the code later on. To do this we will take everything other than the handleInput function and the require statements for “dgram” and “readline”, wrapping them in an IIFE as shown below.
(async function(){ console.log(`Lets get started!`); console.log(`Please enter a command:`); rl.on("line", line => handleInput(line, server));})(); |
To learn more about what exactly an IIFE is and why they are useful in JavaScript, Kyle Simpson does a much better job explaining them than I could ever hope to do in his book “You don’t know JS: Up & Going” which is available free I’d highly recommend checking it out.
All we really need to know about IIFE’s for the purposes of this app is that the function will essentially be called as soon as it has been created. Our next step is to add the call to our new getSocket function within the IIFE that we just created.
const socket = getSocket(); |
The socket that we created emits some events that will be very useful for us when debugging and running our app, in order to make use of these events we need to register some event handlers.
The events that can be emitted from the socket that we care about are:
“message” – This event is fired when a message is received by the socket. An event handler can be provided that will be called with the message that has been received as its first argument, the message can then be used as desired by the developer, in our case we will just be logging messages to the terminal. The event handler is also called with another argument called rinfo, which contains information about where the message was received from.
“error” – This event is fired when an error occurs with the socket connection. An event handler can be provided that will be called with the error that occurred as its first argument, the error can then be inspected and used for logging and error handing purposes.
“listening” – This event is fired when the Socket has been created and is listening (ready to accept) incoming messages. An event handler can be provided, when it is called it is not passed any arguments.
The handlers that we are going to add to the above events are
socket.on("message", (msg) => { console.log(`Message from drone: ${msg.toString()}`);});socket.on("error", (err) => { console.log(`There was an error: ${err}`);});socket.on("listening", () => { console.log("Socket is listening");}); |
In order to send a message, we will use the send() method thats available on our socket. The send method accepts 6 arguments:
“msg” – The message to send.
“offset” – The offset in the buffer where the message starts.
“length” – The number of bytes in the message.
“port” – The destination port, this is the port the message will be sent to.
“address” – The destination host name or ip address, this is where the message will be sent on the network.
“callback” – A callback function that is executed on completion of sending the message, the first argument can be an error, if the error is truthy this indicates that an error occurred and should be dealt with appropriately.
Some more info on this method is available here.
Get the drone into SDK mode
Before we can start sending meaningful commands to our drone, such as “takeoff and “land”, we need to get the drone into SDK mode. Once the drone is in SDK mode we can start to issue it with other commands, and it will (hopefully) respond to them. We can do this in the same way as we would send any other command to the drone, by using our socket’s send() method.
To do this, and to keep things nice and tidy we can create a new function called “sendInitCommand”. The function will take the socket created earlier as an argument and will then make use of the socket.send method to send the command over to the drone. The command that we will be sending is the string “command”.
As the socket.send method is async (It takes in a callback function that is executed on completion of the send operation) we will make our sendInitCommand function return a new Promise. Using promises will allow us to use the async/await syntax that we mentioned earlier, and will make our code easier to read and maintain.
The callback function that we will provide to socket.send will take one parameter, and will follow the standard “error-first” convention with node, this means that any argument passed in as the first argument will be an error object. We can perform a quick check on the value of the argument and if the value is ‘truthy’ this means an error occurred while sending the message, conversely if the value is ‘falsy’ then this means there was no error and everything went as expected (The command was sent to the drone successfully).
In the event that the error is ‘falsy’ (No error occurred), we can safely resolve our promise using the resolve function.
As we are using async/await, if the error is ‘truthy’ (Something went wrong) we will just throw the error and handle it later on rather than rejecting our promise as we normally would.
function sendInitCommand(socket) { return new Promise((resolve) => { socket.send("command",0,"command".length,TELLO_CMD_PORT, TELLO_HOST, err => { if(err) { throw err; } else { return resolve(); } }); });} |
The next step is to actually call the function that we just created. A good place to add this call is under where we added the “listening” event handler.
After all that, our IIFE should now look something like this:
(async function(){ console.log(`Lets get started!`); const socket = getSocket(); socket.on("message", (msg) => { console.log(`Message from drone: ${msg.toString()}`); }); socket.on("error", (err) => { console.log(`There was an error: ${err}`); }); socket.on("listening", () => { console.log("Socket is listening"); }); await sendInitCommand(socket); console.log(`Please enter a command:`); rl.on("line", line => handleInput(line, socket));})(); |
The next steps are to get our drone to take off and land, we can finally start adding the code for sending our takeoff and landing commands to the drone. To do this we can create two new functions, sendTakeOff and sendLand, the implementation of these functions is almost exactly the same as the sendInitCommand that we just created, the only differences being the function names, and the string that they are sending to the drone in the socket.send method. The commands required for takeoff and landing are “takeoff” and “land”.
function sendTakeOff(socket) { return new Promise((resolve) => { socket.send("takeoff",0,"takeoff".length,TELLO_CMD_PORT, TELLO_HOST, err => { if(err) { throw err; } else { return resolve(); } }); });}function sendLand(socket) { return new Promise((resolve) => { socket.send("land",0,"land".length,TELLO_CMD_PORT, TELLO_HOST, err => { if(err) { throw err; } else { return resolve(); } }); });} |
Once we have these functions, things can start to come together. It’s time to wire them up to the switch statement within the handleInput function that we created earlier, essentially what we will do here is to call either the sendTakeOff function or the sendLand function depending on the value of what the user has submitted.
async function handleInput(line, socket) { switch (line) { case "takeoff": console.log("Detected takeoff command."); try { await sendTakeOff(socket); } catch (err) { console.log(err); } break; case "land": console.log("Detected land command."); try { await sendLand(socket); } catch (err) { console.log(err); } break; default: break; }} |
Now we are finally in a position where we can connect to our drone and get it to fly!
The first step is to turn on the drone and to connect to it via WiFi. The drone will normally use an SSID in the following format TELLO-XXXXX – Where XXXXX is a random set of numbers and characters. My drone uses the SSID “TELLO-D3F981”
Once the drone is connected, as we did previously, we can start our app by running:
> node /src/app.js
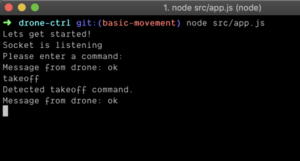
If everything Is working as expected we should see the following output in the terminal.
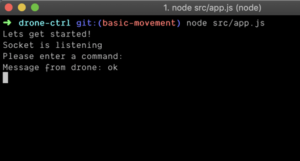
Notice that we are now seeing “Socket is listening” and “Message from drone: ok” in our output. These are messages that have come from the event handlers we added to the “listening” and “message” events earlier on.
When we send commands to our drone, it will sometimes acknowledge that a command has been executed successfully by responding with either the string “ok” or, if the command was not executed successfully a string that represents an error (the value of which will differ depending on the nature of the error).
For other commands the drone will respond with a value, for example, if we send the “battery?” command, the drone will respond with a number between 0 and 100 which is representative of the current battery percentage of the drone.
To get the drone to take off, type “takeoff” and then hit enter. If all has gone as expected the drone should take off and you should see “Message from drone: ok”.
Note: The drone will land automatically if it detects no commands within a 15 second time window.
Once the drone is in the air lets bring it back down to earth. Type “land” and then hit enter, this should make the drone auto-land.
Note: Sometimes after executing a command the drone needs a small amount of time to be ready for the next command. I’m not exactly sure what causes this but normally waiting for a second or so before sending the next command to the drone works.
You’re flying!
So now we have mastered sending commands to our drone and taking off and landing, in the next part of this blog I will show you how to send directional commands. This will allow you to fly your drone forward, back, up, down and on trajectories. Happy hacking!
You can read Part 2 here: https://gofore.com/en/fly-a-drone-with-node-js-part-2/